Mobile Detail Center

Tag: Paint Contamination

  • How to Remove Baked-On Brake Dust From Alloy Wheels

    How to Remove Baked-On Brake Dust From Alloy Wheels

    Menu

    PAINT & WHEEL CARE

    How to Remove Baked-On Brake Dust From Alloy Wheels

    How to remove baked on brake dust from alloy wheels. Learn the process, timing, local conditions, common mistakes, and when professional help makes sense in.

    Serving every city and neighborhood in Orange County, California.
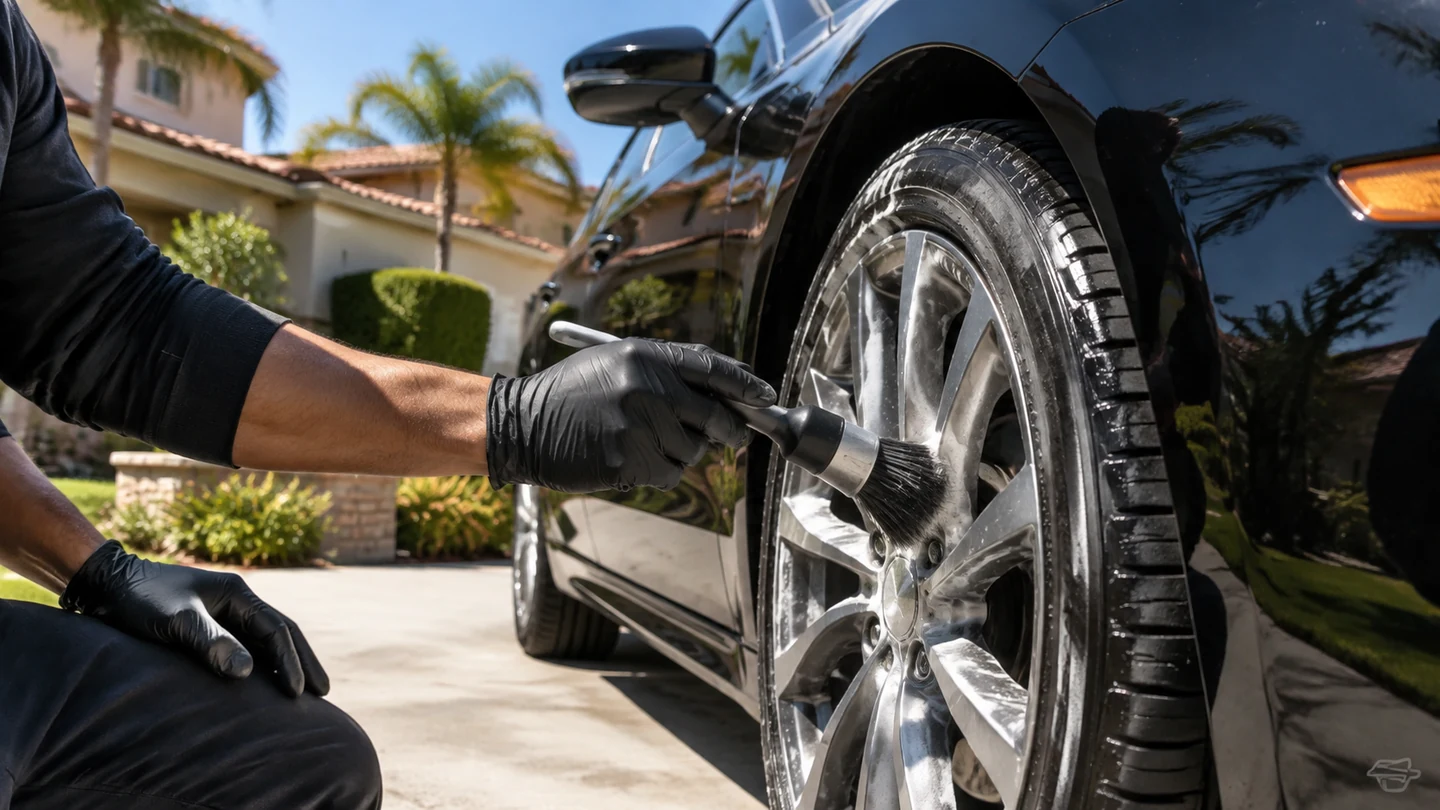
    Mobile detailing service in Orange County for how to remove baked on brake dust from alloy wheels

    By Blog Writer · approximately 14 minute read · Updated September 2026 · Topic: how to remove baked on brake dust from alloy wheels

    Quick answer: how to remove baked on brake dust from alloy wheels

    Confirm the wheel finish, work when the wheel is cool, rinse loose grit, use a cleaner labeled for that finish, agitate with dedicated soft tools, and rinse before the chemistry dries. Repeat rather than using a metal brush or harsh household acid.

    Paint care should move from the least aggressive suitable method to stronger correction only after inspection. A hidden-area test and a cool, clean surface reduce avoidable surprises. For how to remove baked on brake dust from alloy wheels, the purpose of this guide is to help you ask better questions, choose a suitable scope, and know what to inspect before accepting the result. It cannot replace the care instructions for your exact vehicle, finish, upholstery, accessory, or cleaning product.

    When people search for how to remove baked on brake dust from alloy wheels, they often want a single number or shortcut. The responsible answer is a repeatable process: identify the surface and condition, control the work area, use compatible tools and chemistry, remove residue, allow required drying or curing, and inspect again. That process protects the vehicle and gives the customer a clearer handoff.

    What changes the right answer

    The following variables determine whether common how to remove baked on brake dust from alloy wheels advice is appropriate. Review them together for “How to Remove Baked-On Brake Dust From Alloy Wheels”; one factor can change the method even when the rest of the vehicle looks ordinary.

    Clear-coated, painted, polished, matte, or chrome finish

    Clear-coated, painted, polished, matte, or chrome finish. Treat this as a decision point, not a box to check. Record what you observe, compare it with the vehicle or product instructions, and choose the least aggressive suitable response. That discipline keeps how to remove baked on brake dust from alloy wheels guidance tied to the actual vehicle instead of a generic promise. Paint care should move from the least aggressive suitable method to stronger correction only after inspection. A hidden-area test and a cool, clean surface reduce avoidable surprises.

    Wheel temperature

    Wheel temperature. Look at this factor before tools or chemicals touch the surface. It changes the labor, the safe method, and the result that can reasonably be approved. If the condition is uncertain, pause for a concealed-area test or a professional inspection rather than increasing force.

    Dust thickness and age

    Dust thickness and age. This detail is easy to overlook, yet it often explains why two similar-looking vehicles need different plans. Confirm it in useful light, keep notes or photos when appropriate, and make the customer or technician aware of any limitation before the work proceeds.

    Existing finish damage

    Existing finish damage. The practical test is whether the chosen method removes the unwanted material without changing the surface underneath. Work in a small controlled area, inspect the towel or tool, and stop when the finish reacts differently than expected.

    Cleaner pH and compatibility

    Cleaner pH and compatibility. Build enough time for this into the appointment. Rushing tends to move contamination, leave residue, or skip drying and inspection. A clear sequence makes the result easier to verify at customer handoff and easier to maintain afterward.

    Access to barrels and lug recesses

    Access to barrels and lug recesses. Consider both the visible surface and what sits below or behind it. Moisture, foam, seams, coatings, electronics, and prior repairs may not be obvious. Material identification is part of good how to remove baked on brake dust from alloy wheels work, not an optional extra.
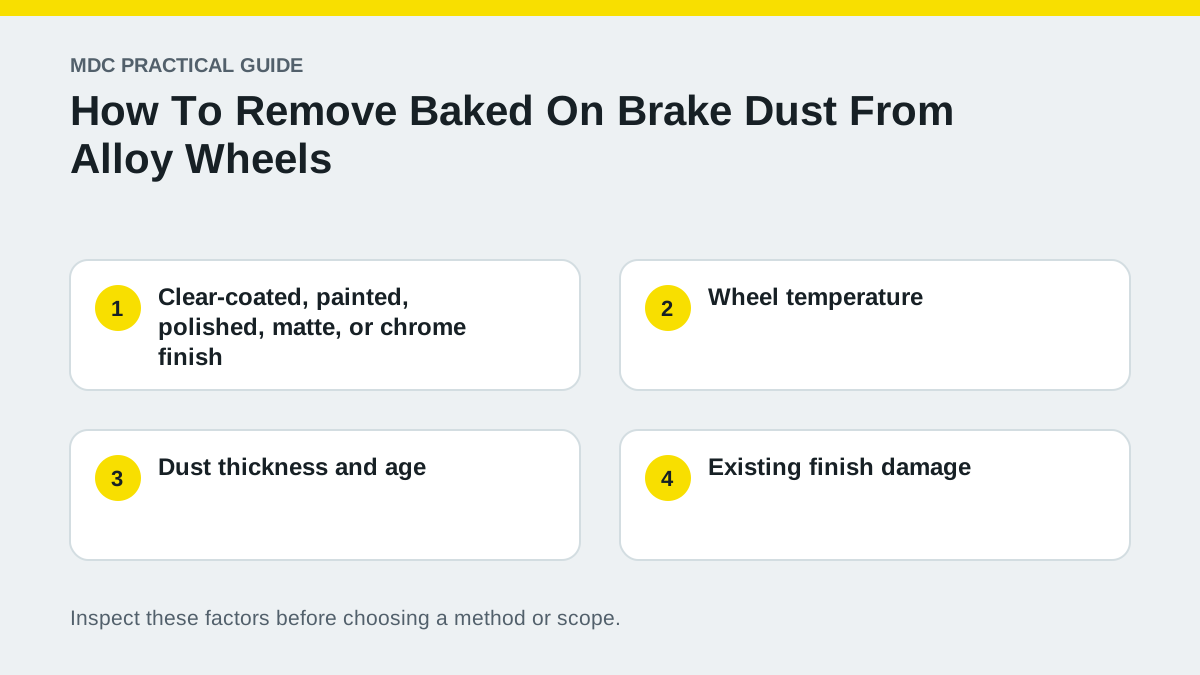
    Decision factors for how to remove baked on brake dust from alloy wheels
    Use condition and material—not guesswork—to choose the scope.

    A practical step-by-step plan

    This sequence keeps how to remove baked on brake dust from alloy wheels work observable and reversible for as long as possible. Product labels and the vehicle owner’s manual take priority whenever they set a narrower limit.

    Step 1: Inspect each wheel separately

    Inspect each wheel separately. This detail is easy to overlook, yet it often explains why two similar-looking vehicles need different plans. Confirm it in useful light, keep notes or photos when appropriate, and make the customer or technician aware of any limitation before the work proceeds.

    Step 2: Cool the wheel and rinse

    Cool the wheel and rinse. The practical test is whether the chosen method removes the unwanted material without changing the surface underneath. Work in a small controlled area, inspect the towel or tool, and stop when the finish reacts differently than expected.

    Step 3: Test the cleaner

    Test the cleaner. Build enough time for this into the appointment. Rushing tends to move contamination, leave residue, or skip drying and inspection. A clear sequence makes the result easier to verify at customer handoff and easier to maintain afterward.

    Step 4: Work one wheel at a time

    Work one wheel at a time. Consider both the visible surface and what sits below or behind it. Moisture, foam, seams, coatings, electronics, and prior repairs may not be obvious. Material identification is part of good how to remove baked on brake dust from alloy wheels work, not an optional extra.

    Step 5: Agitate with dedicated brushes

    Agitate with dedicated brushes. Use the same standard on every section: inspect, test, perform the minimum effective action, remove residue, then evaluate again. That makes the process repeatable without pretending every panel, seat, lens, or vehicle is identical.

    Step 6: Rinse calipers, spokes, and recesses

    Rinse calipers, spokes, and recesses. Treat this as a decision point, not a box to check. Record what you observe, compare it with the vehicle or product instructions, and choose the least aggressive suitable response. That discipline keeps how to remove baked on brake dust from alloy wheels guidance tied to the actual vehicle instead of a generic promise.

    Step 7: Dry and inspect before protection

    Dry and inspect before protection. Look at this factor before tools or chemicals touch the surface. It changes the labor, the safe method, and the result that can reasonably be approved. If the condition is uncertain, pause for a concealed-area test or a professional inspection rather than increasing force.
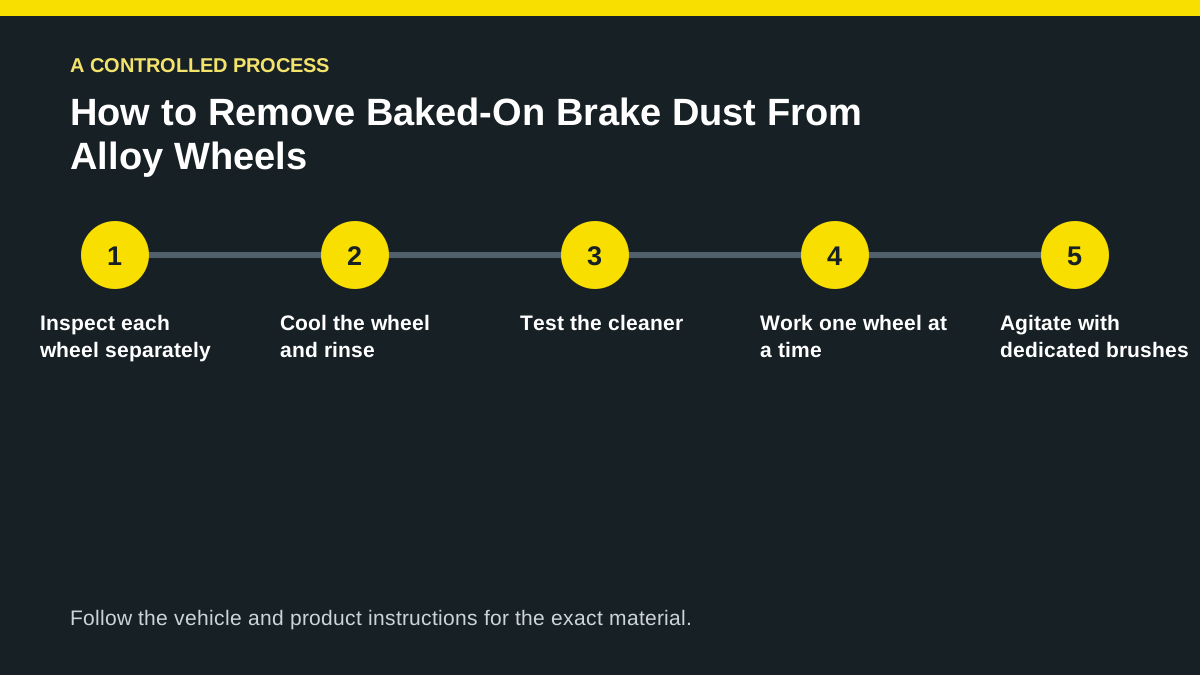
    Step-by-step process for how to remove baked on brake dust from alloy wheels
    A controlled sequence makes the final inspection more meaningful.

    Timing, cost, and realistic expectations

    Time and price for how to remove baked on brake dust from alloy wheels follow scope. A lightly affected, accessible area may need a short maintenance step; an older vehicle with embedded soil, prior product residue, multiple materials, or damage needs more inspection and labor. A quote should state the selected service, vehicle class, add-ons, and agreed final amount. Duration is useful for planning the detailer’s work and the customer’s handoff, but it should not be used to rush a careful process.

    Some how to remove baked on brake dust from alloy wheels results can be judged immediately, such as loose debris removal or a clean exterior panel. Upholstery, carpet, coatings, and odor work may need drying or cure time before the final condition is clear. Permanent dye change, coating failure, cracks, corrosion, burned paint, worn fabric, and contamination deep inside foam are not the same as removable soil. A reputable service distinguishes improvement from repair and does not guarantee an outcome before inspection.

    For “How to Remove Baked-On Brake Dust From Alloy Wheels,” ask what is included, what is excluded, how a condition-based add-on is approved, and what happens if the technician finds damage or a material that cannot be treated safely. MDC’s booking form displays the configured service prices and selectable extras. Operations confirms the appointment and final scope so the customer and detailer share the same record.

    Orange County conditions to consider

    Stop-and-go freeway and canyon driving can build dense dust, while sprinklers and sun bake deposits onto faces and barrels. Wheels with curb damage, failing clear coat, polished metal, or aftermarket coatings need extra caution.

    Mobile how to remove baked on brake dust from alloy wheels work also depends on the service location. The vehicle needs a safe, lawful, accessible area with permission from the property owner or manager when required. Water, power, shade, traffic, gates, parking rules, and runoff control may affect whether the planned process can be completed there. A good booking request describes those conditions instead of leaving the technician to discover them at arrival.

    Weather can change during a “How to Remove Baked-On Brake Dust From Alloy Wheels” appointment. Hot panels shorten product dwell time, wind moves dust across clean surfaces, coastal humidity slows fabric drying, and unexpected rain can make exterior work unsuitable. Rescheduling or adjusting a scope protects the result; it is not a reason to skip preparation, documentation, or customer approval.

    Common mistakes to avoid

    Most avoidable damage comes from excessive force, incompatible chemistry, cross-contaminated tools, uncontrolled moisture, or a rushed handoff. Watch for these specific errors when planning how to remove baked on brake dust from alloy wheels.

    Cleaning hot wheels

    Cleaning hot wheels. Build enough time for this into the appointment. Rushing tends to move contamination, leave residue, or skip drying and inspection. A clear sequence makes the result easier to verify at customer handoff and easier to maintain afterward.

    Using one brush on wheels and paint

    Using one brush on wheels and paint. Consider both the visible surface and what sits below or behind it. Moisture, foam, seams, coatings, electronics, and prior repairs may not be obvious. Material identification is part of good how to remove baked on brake dust from alloy wheels work, not an optional extra.

    Letting chemical dry

    Letting chemical dry. Use the same standard on every section: inspect, test, perform the minimum effective action, remove residue, then evaluate again. That makes the process repeatable without pretending every panel, seat, lens, or vehicle is identical.

    Scrubbing failing clear coat

    Scrubbing failing clear coat. Treat this as a decision point, not a box to check. Record what you observe, compare it with the vehicle or product instructions, and choose the least aggressive suitable response. That discipline keeps how to remove baked on brake dust from alloy wheels guidance tied to the actual vehicle instead of a generic promise.

    Hiding unresolved damage with dressing

    Hiding unresolved damage with dressing. Look at this factor before tools or chemicals touch the surface. It changes the labor, the safe method, and the result that can reasonably be approved. If the condition is uncertain, pause for a concealed-area test or a professional inspection rather than increasing force.

    When professional help makes sense

    Professional help with how to remove baked on brake dust from alloy wheels is useful when the vehicle has several materials, limited access, embedded contamination, uncertain prior repairs, or a result that needs documented inspection. A technician can also identify when the condition belongs with a body shop, upholstery repairer, glass specialist, electrician, mold remediator, hazardous-spill service, or another qualified trade. Saying that a surface should not be treated is sometimes the safest professional conclusion.

    MDC offers mobile service throughout Orange County for requests such as “How to Remove Baked-On Brake Dust From Alloy Wheels.” Review the Exterior Detailing page for the closest service match, browse the Orange County service area, or use the online booking form to choose a vehicle and see currently configured options. The submitted request is reviewed before the appointment is confirmed.

    Frequently asked questions

    Why does brake dust stick so hard?

    Heat, moisture, road film, and time can bind fine particles to the finish, especially when cleaning is delayed. For how to remove baked on brake dust from alloy wheels, use that answer as a starting point and verify the actual vehicle, material, and approved service scope.

    Can wheel cleaner damage brakes?

    Use products as directed and rinse thoroughly; avoid uncontrolled application to hot components. For how to remove baked on brake dust from alloy wheels, use that answer as a starting point and verify the actual vehicle, material, and approved service scope.

    Will polishing remove every dark spot?

    Not when the finish is etched, corroded, or failing. Cleaning should precede any correction decision. For how to remove baked on brake dust from alloy wheels, use that answer as a starting point and verify the actual vehicle, material, and approved service scope.

    How can I reduce future buildup?

    Frequent gentle cleaning and a compatible wheel protectant can make maintenance easier, but brake dust will still occur. For how to remove baked on brake dust from alloy wheels, use that answer as a starting point and verify the actual vehicle, material, and approved service scope.

    Suggested reading

    These related MDC guides explain decisions adjacent to how to remove baked on brake dust from alloy wheels and use the same inspect-first approach:

    Sources and care directions

    Sources for this how to remove baked on brake dust from alloy wheels guide were reviewed September 12, 2026. External material is provided for context; product labels, current manufacturer instructions, and the manual for the exact vehicle control the work.

    Add wheel care to an exterior detail when normal shampoo no longer releases the buildup safely.

    For how to remove baked on brake dust from alloy wheels, tell us the vehicle, condition, service location, and result you want. We will review the request, confirm the scope and agreed final price, and send appointment updates as the job moves forward.
  • How to Remove Pollen From a Car Without Scratching It

    How to Remove Pollen From a Car Without Scratching It

    Menu

    PAINT & WHEEL CARE

    How to Remove Pollen From a Car Without Scratching It

    Remove pollen from car. Learn the process, timing, local conditions, common mistakes, and when professional help makes sense in this practical guide.

    Serving every city and neighborhood in Orange County, California.

    Mobile detailing service in Orange County for remove pollen from car

    By Blog Writer · approximately 14 minute read · Updated September 2026 · Topic: remove pollen from car

    Quick answer: remove pollen from car

    Do not wipe a dry yellow film with a dry towel. Rinse loose particles, wash with clean lubricated media when needed, flush seams and wiper areas, then dry with clean towels or a suitable touch-free method.

    Paint care should move from the least aggressive suitable method to stronger correction only after inspection. A hidden-area test and a cool, clean surface reduce avoidable surprises. For remove pollen from car, the purpose of this guide is to help you ask better questions, choose a suitable scope, and know what to inspect before accepting the result. It cannot replace the care instructions for your exact vehicle, finish, upholstery, accessory, or cleaning product.

    When people search for remove pollen from car, they often want a single number or shortcut. The responsible answer is a repeatable process: identify the surface and condition, control the work area, use compatible tools and chemistry, remove residue, allow required drying or curing, and inspect again. That process protects the vehicle and gives the customer a clearer handoff.

    What changes the right answer

    The following variables determine whether common remove pollen from car advice is appropriate. Review them together for “How to Remove Pollen From a Car Without Scratching It”; one factor can change the method even when the rest of the vehicle looks ordinary.

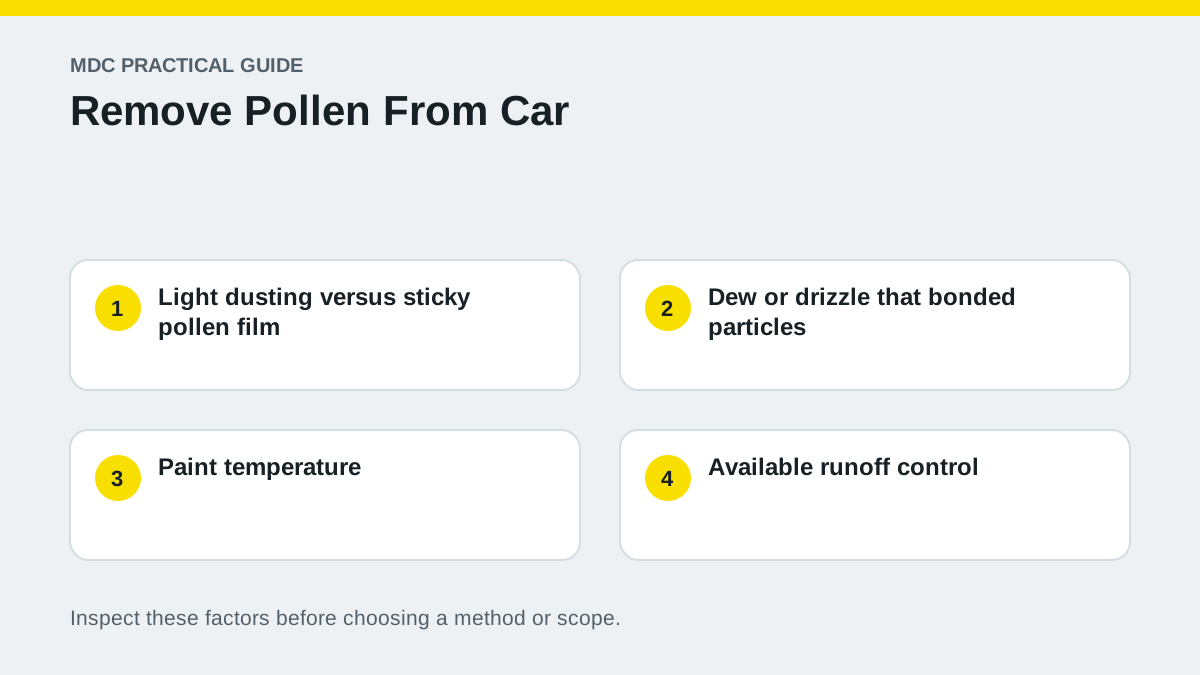
    Light dusting versus sticky pollen film

    Light dusting versus sticky pollen film. Treat this as a decision point, not a box to check. Record what you observe, compare it with the vehicle or product instructions, and choose the least aggressive suitable response. That discipline keeps remove pollen from car guidance tied to the actual vehicle instead of a generic promise. Paint care should move from the least aggressive suitable method to stronger correction only after inspection. A hidden-area test and a cool, clean surface reduce avoidable surprises.

    Dew or drizzle that bonded particles

    Dew or drizzle that bonded particles. Look at this factor before tools or chemicals touch the surface. It changes the labor, the safe method, and the result that can reasonably be approved. If the condition is uncertain, pause for a concealed-area test or a professional inspection rather than increasing force.

    Paint temperature

    Paint temperature. This detail is easy to overlook, yet it often explains why two similar-looking vehicles need different plans. Confirm it in useful light, keep notes or photos when appropriate, and make the customer or technician aware of any limitation before the work proceeds.

    Available runoff control

    Available runoff control. The practical test is whether the chosen method removes the unwanted material without changing the surface underneath. Work in a small controlled area, inspect the towel or tool, and stop when the finish reacts differently than expected.

    Cleanliness of towels and mitts

    Cleanliness of towels and mitts. Build enough time for this into the appointment. Rushing tends to move contamination, leave residue, or skip drying and inspection. A clear sequence makes the result easier to verify at customer handoff and easier to maintain afterward.

    Pollen trapped around seals and wipers

    Pollen trapped around seals and wipers. Consider both the visible surface and what sits below or behind it. Moisture, foam, seams, coatings, electronics, and prior repairs may not be obvious. Material identification is part of good remove pollen from car work, not an optional extra.

    Decision factors for remove pollen from car
    Use condition and material—not guesswork—to choose the scope.

    A practical step-by-step plan

    This sequence keeps remove pollen from car work observable and reversible for as long as possible. Product labels and the vehicle owner’s manual take priority whenever they set a narrower limit.

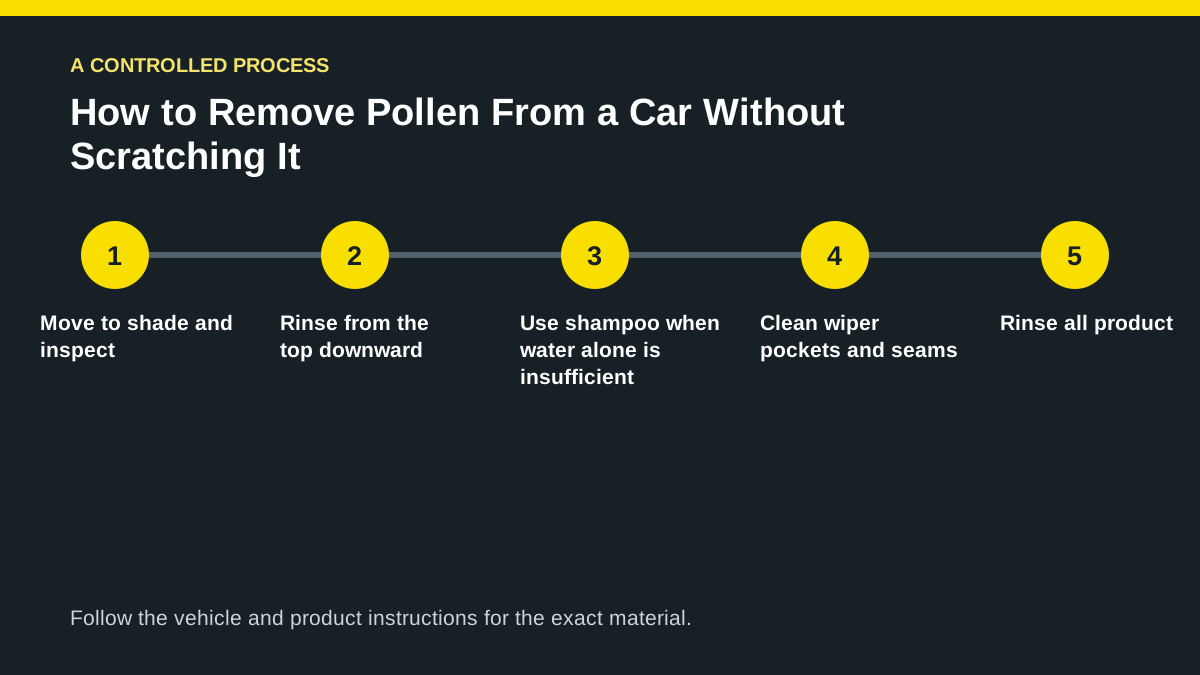
    Step 1: Move to shade and inspect

    Move to shade and inspect. This detail is easy to overlook, yet it often explains why two similar-looking vehicles need different plans. Confirm it in useful light, keep notes or photos when appropriate, and make the customer or technician aware of any limitation before the work proceeds.

    Step 2: Rinse from the top downward

    Rinse from the top downward. The practical test is whether the chosen method removes the unwanted material without changing the surface underneath. Work in a small controlled area, inspect the towel or tool, and stop when the finish reacts differently than expected.

    Step 3: Use shampoo when water alone is insufficient

    Use shampoo when water alone is insufficient. Build enough time for this into the appointment. Rushing tends to move contamination, leave residue, or skip drying and inspection. A clear sequence makes the result easier to verify at customer handoff and easier to maintain afterward.

    Step 4: Clean wiper pockets and seams

    Clean wiper pockets and seams. Consider both the visible surface and what sits below or behind it. Moisture, foam, seams, coatings, electronics, and prior repairs may not be obvious. Material identification is part of good remove pollen from car work, not an optional extra.

    Step 5: Rinse all product

    Rinse all product. Use the same standard on every section: inspect, test, perform the minimum effective action, remove residue, then evaluate again. That makes the process repeatable without pretending every panel, seat, lens, or vehicle is identical.

    Step 6: Dry with clean media

    Dry with clean media. Treat this as a decision point, not a box to check. Record what you observe, compare it with the vehicle or product instructions, and choose the least aggressive suitable response. That discipline keeps remove pollen from car guidance tied to the actual vehicle instead of a generic promise.

    Step 7: Check glass and cabin intake areas

    Check glass and cabin intake areas. Look at this factor before tools or chemicals touch the surface. It changes the labor, the safe method, and the result that can reasonably be approved. If the condition is uncertain, pause for a concealed-area test or a professional inspection rather than increasing force.

    Step-by-step process for remove pollen from car
    A controlled sequence makes the final inspection more meaningful.

    Timing, cost, and realistic expectations

    Time and price for remove pollen from car follow scope. A lightly affected, accessible area may need a short maintenance step; an older vehicle with embedded soil, prior product residue, multiple materials, or damage needs more inspection and labor. A quote should state the selected service, vehicle class, add-ons, and agreed final amount. Duration is useful for planning the detailer’s work and the customer’s handoff, but it should not be used to rush a careful process.

    Some remove pollen from car results can be judged immediately, such as loose debris removal or a clean exterior panel. Upholstery, carpet, coatings, and odor work may need drying or cure time before the final condition is clear. Permanent dye change, coating failure, cracks, corrosion, burned paint, worn fabric, and contamination deep inside foam are not the same as removable soil. A reputable service distinguishes improvement from repair and does not guarantee an outcome before inspection.

    For “How to Remove Pollen From a Car Without Scratching It,” ask what is included, what is excluded, how a condition-based add-on is approved, and what happens if the technician finds damage or a material that cannot be treated safely. MDC’s booking form displays the configured service prices and selectable extras. Operations confirms the appointment and final scope so the customer and detailer share the same record.

    Orange County conditions to consider

    Orange County winds and flowering trees can reload a clean vehicle in hours. Covered parking, a clean cabin filter area, and prompt rinsing after heavy exposure can reduce repeated abrasive contact.

    Mobile remove pollen from car work also depends on the service location. The vehicle needs a safe, lawful, accessible area with permission from the property owner or manager when required. Water, power, shade, traffic, gates, parking rules, and runoff control may affect whether the planned process can be completed there. A good booking request describes those conditions instead of leaving the technician to discover them at arrival.

    Weather can change during a “How to Remove Pollen From a Car Without Scratching It” appointment. Hot panels shorten product dwell time, wind moves dust across clean surfaces, coastal humidity slows fabric drying, and unexpected rain can make exterior work unsuitable. Rescheduling or adjusting a scope protects the result; it is not a reason to skip preparation, documentation, or customer approval.

    Common mistakes to avoid

    Most avoidable damage comes from excessive force, incompatible chemistry, cross-contaminated tools, uncontrolled moisture, or a rushed handoff. Watch for these specific errors when planning remove pollen from car.

    Dusting with a dry bath towel

    Dusting with a dry bath towel. Build enough time for this into the appointment. Rushing tends to move contamination, leave residue, or skip drying and inspection. A clear sequence makes the result easier to verify at customer handoff and easier to maintain afterward.

    Using a dirty California-style duster

    Using a dirty California-style duster. Consider both the visible surface and what sits below or behind it. Moisture, foam, seams, coatings, electronics, and prior repairs may not be obvious. Material identification is part of good remove pollen from car work, not an optional extra.

    Washing only the visible horizontal panels

    Washing only the visible horizontal panels. Use the same standard on every section: inspect, test, perform the minimum effective action, remove residue, then evaluate again. That makes the process repeatable without pretending every panel, seat, lens, or vehicle is identical.

    Grinding pollen under wipers

    Grinding pollen under wipers. Treat this as a decision point, not a box to check. Record what you observe, compare it with the vehicle or product instructions, and choose the least aggressive suitable response. That discipline keeps remove pollen from car guidance tied to the actual vehicle instead of a generic promise.

    Letting rinse water spot the paint

    Letting rinse water spot the paint. Look at this factor before tools or chemicals touch the surface. It changes the labor, the safe method, and the result that can reasonably be approved. If the condition is uncertain, pause for a concealed-area test or a professional inspection rather than increasing force.

    When professional help makes sense

    Professional help with remove pollen from car is useful when the vehicle has several materials, limited access, embedded contamination, uncertain prior repairs, or a result that needs documented inspection. A technician can also identify when the condition belongs with a body shop, upholstery repairer, glass specialist, electrician, mold remediator, hazardous-spill service, or another qualified trade. Saying that a surface should not be treated is sometimes the safest professional conclusion.

    MDC offers mobile service throughout Orange County for requests such as “How to Remove Pollen From a Car Without Scratching It.” Review the Mobile Car Wash page for the closest service match, browse the Orange County service area, or use the online booking form to choose a vehicle and see currently configured options. The submitted request is reviewed before the appointment is confirmed.

    Frequently asked questions

    Can pollen scratch paint?

    Individual grains and trapped grit can mar the surface when dragged under dry pressure. Safe removal limits friction. For remove pollen from car, use that answer as a starting point and verify the actual vehicle, material, and approved service scope.

    Will rain remove pollen?

    Light rain can turn dust into spots or paste. A controlled rinse and wash is more reliable. For remove pollen from car, use that answer as a starting point and verify the actual vehicle, material, and approved service scope.

    Can I use a leaf blower?

    A clean, suitable blower can reduce contact during drying, but never aim debris from the ground back at the paint. For remove pollen from car, use that answer as a starting point and verify the actual vehicle, material, and approved service scope.

    How often should I rinse during pollen season?

    Inspect the vehicle and clean when accumulation becomes visible or sticky, while avoiding unnecessary dry wiping. For remove pollen from car, use that answer as a starting point and verify the actual vehicle, material, and approved service scope.

    Suggested reading

    These related MDC guides explain decisions adjacent to remove pollen from car and use the same inspect-first approach:

    Sources and care directions

    Sources for this remove pollen from car guide were reviewed September 12, 2026. External material is provided for context; product labels, current manufacturer instructions, and the manual for the exact vehicle control the work.

    Choose a maintenance wash when pollen has bonded or collected in seams where a quick dry wipe would be risky.

    For remove pollen from car, tell us the vehicle, condition, service location, and result you want. We will review the request, confirm the scope and agreed final price, and send appointment updates as the job moves forward.
  • How to Remove Road Tar From Car Paint Safely

    How to Remove Road Tar From Car Paint Safely

    Menu

    PAINT & WHEEL CARE

    How to Remove Road Tar From Car Paint Safely

    Remove tar from car paint. Learn the process, timing, local conditions, common mistakes, and when professional help makes sense in this practical guide.

    Serving every city and neighborhood in Orange County, California.

    Mobile detailing service in Orange County for remove tar from car paint

    By Blog Writer · approximately 14 minute read · Updated September 2026 · Topic: remove tar from car paint

    Quick answer: remove tar from car paint

    Wash loose soil first, then use a dedicated automotive tar remover that is compatible with the finish. Let chemistry loosen the spots, wipe with clean microfiber using light pressure, wash the panel, and restore protection if the remover affected it.

    Paint care should move from the least aggressive suitable method to stronger correction only after inspection. A hidden-area test and a cool, clean surface reduce avoidable surprises. For remove tar from car paint, the purpose of this guide is to help you ask better questions, choose a suitable scope, and know what to inspect before accepting the result. It cannot replace the care instructions for your exact vehicle, finish, upholstery, accessory, or cleaning product.

    When people search for remove tar from car paint, they often want a single number or shortcut. The responsible answer is a repeatable process: identify the surface and condition, control the work area, use compatible tools and chemistry, remove residue, allow required drying or curing, and inspect again. That process protects the vehicle and gives the customer a clearer handoff.

    What changes the right answer

    The following variables determine whether common remove tar from car paint advice is appropriate. Review them together for “How to Remove Road Tar From Car Paint Safely”; one factor can change the method even when the rest of the vehicle looks ordinary.

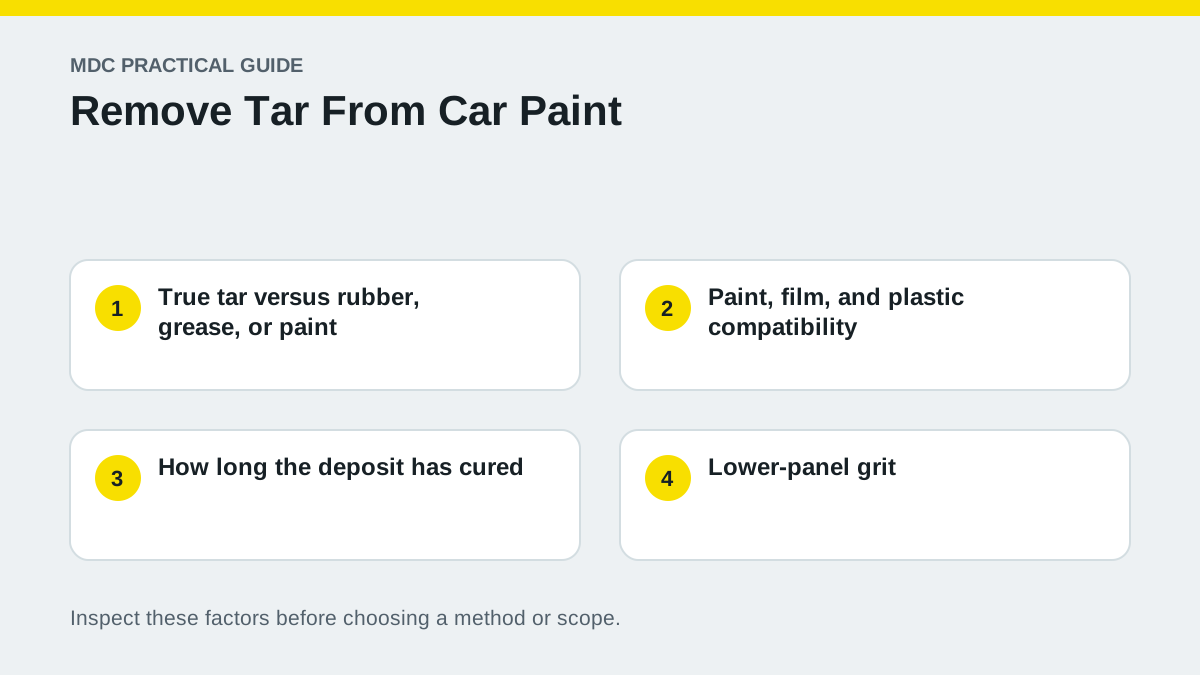
    True tar versus rubber, grease, or paint

    True tar versus rubber, grease, or paint. Treat this as a decision point, not a box to check. Record what you observe, compare it with the vehicle or product instructions, and choose the least aggressive suitable response. That discipline keeps remove tar from car paint guidance tied to the actual vehicle instead of a generic promise. Paint care should move from the least aggressive suitable method to stronger correction only after inspection. A hidden-area test and a cool, clean surface reduce avoidable surprises.

    Paint, film, and plastic compatibility

    Paint, film, and plastic compatibility. Look at this factor before tools or chemicals touch the surface. It changes the labor, the safe method, and the result that can reasonably be approved. If the condition is uncertain, pause for a concealed-area test or a professional inspection rather than increasing force.

    How long the deposit has cured

    How long the deposit has cured. This detail is easy to overlook, yet it often explains why two similar-looking vehicles need different plans. Confirm it in useful light, keep notes or photos when appropriate, and make the customer or technician aware of any limitation before the work proceeds.

    Lower-panel grit

    Lower-panel grit. The practical test is whether the chosen method removes the unwanted material without changing the surface underneath. Work in a small controlled area, inspect the towel or tool, and stop when the finish reacts differently than expected.

    Product dwell limits

    Product dwell limits. Build enough time for this into the appointment. Rushing tends to move contamination, leave residue, or skip drying and inspection. A clear sequence makes the result easier to verify at customer handoff and easier to maintain afterward.

    Protection remaining after cleanup

    Protection remaining after cleanup. Consider both the visible surface and what sits below or behind it. Moisture, foam, seams, coatings, electronics, and prior repairs may not be obvious. Material identification is part of good remove tar from car paint work, not an optional extra.

    Decision factors for remove tar from car paint
    Use condition and material—not guesswork—to choose the scope.

    A practical step-by-step plan

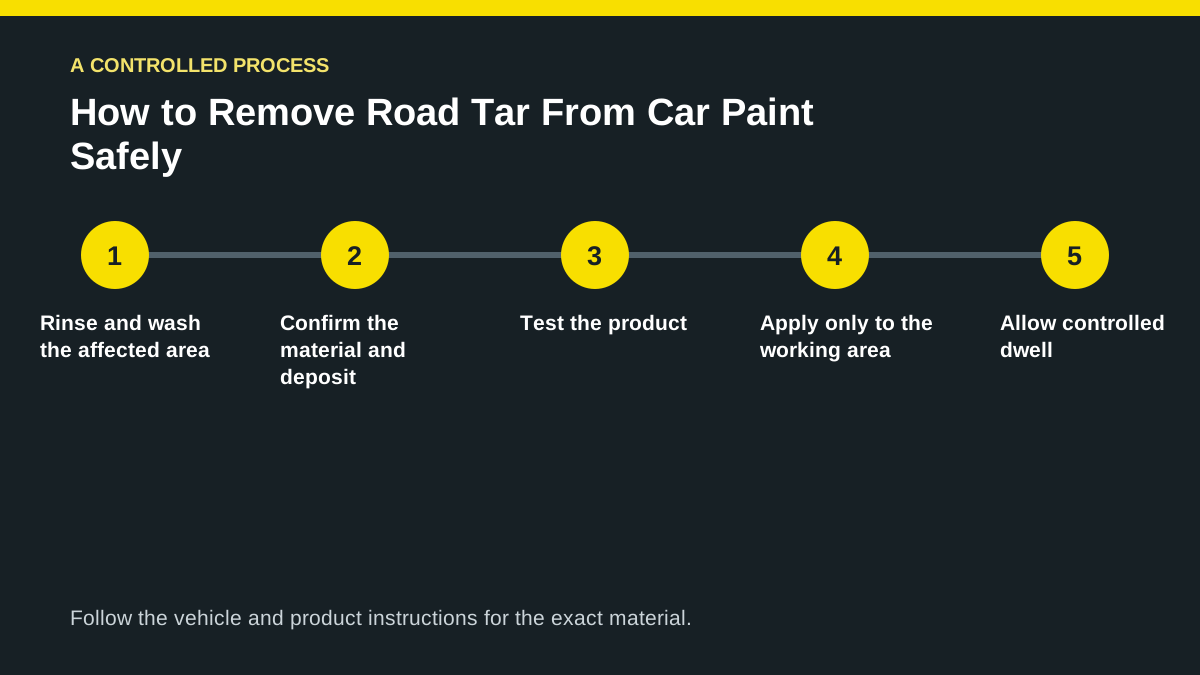
    This sequence keeps remove tar from car paint work observable and reversible for as long as possible. Product labels and the vehicle owner’s manual take priority whenever they set a narrower limit.

    Step 1: Rinse and wash the affected area

    Rinse and wash the affected area. This detail is easy to overlook, yet it often explains why two similar-looking vehicles need different plans. Confirm it in useful light, keep notes or photos when appropriate, and make the customer or technician aware of any limitation before the work proceeds.

    Step 2: Confirm the material and deposit

    Confirm the material and deposit. The practical test is whether the chosen method removes the unwanted material without changing the surface underneath. Work in a small controlled area, inspect the towel or tool, and stop when the finish reacts differently than expected.

    Step 3: Test the product

    Test the product. Build enough time for this into the appointment. Rushing tends to move contamination, leave residue, or skip drying and inspection. A clear sequence makes the result easier to verify at customer handoff and easier to maintain afterward.

    Step 4: Apply only to the working area

    Apply only to the working area. Consider both the visible surface and what sits below or behind it. Moisture, foam, seams, coatings, electronics, and prior repairs may not be obvious. Material identification is part of good remove tar from car paint work, not an optional extra.

    Step 5: Allow controlled dwell

    Allow controlled dwell. Use the same standard on every section: inspect, test, perform the minimum effective action, remove residue, then evaluate again. That makes the process repeatable without pretending every panel, seat, lens, or vehicle is identical.

    Step 6: Lift residue with fresh towel faces

    Lift residue with fresh towel faces. Treat this as a decision point, not a box to check. Record what you observe, compare it with the vehicle or product instructions, and choose the least aggressive suitable response. That discipline keeps remove tar from car paint guidance tied to the actual vehicle instead of a generic promise.

    Step 7: Rewash, inspect, and protect

    Rewash, inspect, and protect. Look at this factor before tools or chemicals touch the surface. It changes the labor, the safe method, and the result that can reasonably be approved. If the condition is uncertain, pause for a concealed-area test or a professional inspection rather than increasing force.

    Step-by-step process for remove tar from car paint
    A controlled sequence makes the final inspection more meaningful.

    Timing, cost, and realistic expectations

    Time and price for remove tar from car paint follow scope. A lightly affected, accessible area may need a short maintenance step; an older vehicle with embedded soil, prior product residue, multiple materials, or damage needs more inspection and labor. A quote should state the selected service, vehicle class, add-ons, and agreed final amount. Duration is useful for planning the detailer’s work and the customer’s handoff, but it should not be used to rush a careful process.

    Some remove tar from car paint results can be judged immediately, such as loose debris removal or a clean exterior panel. Upholstery, carpet, coatings, and odor work may need drying or cure time before the final condition is clear. Permanent dye change, coating failure, cracks, corrosion, burned paint, worn fabric, and contamination deep inside foam are not the same as removable soil. A reputable service distinguishes improvement from repair and does not guarantee an outcome before inspection.

    For “How to Remove Road Tar From Car Paint Safely,” ask what is included, what is excluded, how a condition-based add-on is approved, and what happens if the technician finds damage or a material that cannot be treated safely. MDC’s booking form displays the configured service prices and selectable extras. Operations confirms the appointment and final scope so the customer and detailer share the same record.

    Orange County conditions to consider

    Fresh road work and freeway driving can dot rocker panels, lower doors, wheel arches, and rear bumpers. Treat those areas separately so gritty lower-panel towels never return to cleaner paint.

    Mobile remove tar from car paint work also depends on the service location. The vehicle needs a safe, lawful, accessible area with permission from the property owner or manager when required. Water, power, shade, traffic, gates, parking rules, and runoff control may affect whether the planned process can be completed there. A good booking request describes those conditions instead of leaving the technician to discover them at arrival.

    Weather can change during a “How to Remove Road Tar From Car Paint Safely” appointment. Hot panels shorten product dwell time, wind moves dust across clean surfaces, coastal humidity slows fabric drying, and unexpected rain can make exterior work unsuitable. Rescheduling or adjusting a scope protects the result; it is not a reason to skip preparation, documentation, or customer approval.

    Common mistakes to avoid

    Most avoidable damage comes from excessive force, incompatible chemistry, cross-contaminated tools, uncontrolled moisture, or a rushed handoff. Watch for these specific errors when planning remove tar from car paint.

    Scraping spots with a fingernail or blade

    Scraping spots with a fingernail or blade. Build enough time for this into the appointment. Rushing tends to move contamination, leave residue, or skip drying and inspection. A clear sequence makes the result easier to verify at customer handoff and easier to maintain afterward.

    Using gasoline or uncontrolled solvent

    Using gasoline or uncontrolled solvent. Consider both the visible surface and what sits below or behind it. Moisture, foam, seams, coatings, electronics, and prior repairs may not be obvious. Material identification is part of good remove tar from car paint work, not an optional extra.

    Wiping over dry road grit

    Wiping over dry road grit. Use the same standard on every section: inspect, test, perform the minimum effective action, remove residue, then evaluate again. That makes the process repeatable without pretending every panel, seat, lens, or vehicle is identical.

    Letting remover dry

    Letting remover dry. Treat this as a decision point, not a box to check. Record what you observe, compare it with the vehicle or product instructions, and choose the least aggressive suitable response. That discipline keeps remove tar from car paint guidance tied to the actual vehicle instead of a generic promise.

    Skipping the final wash

    Skipping the final wash. Look at this factor before tools or chemicals touch the surface. It changes the labor, the safe method, and the result that can reasonably be approved. If the condition is uncertain, pause for a concealed-area test or a professional inspection rather than increasing force.

    When professional help makes sense

    Professional help with remove tar from car paint is useful when the vehicle has several materials, limited access, embedded contamination, uncertain prior repairs, or a result that needs documented inspection. A technician can also identify when the condition belongs with a body shop, upholstery repairer, glass specialist, electrician, mold remediator, hazardous-spill service, or another qualified trade. Saying that a surface should not be treated is sometimes the safest professional conclusion.

    MDC offers mobile service throughout Orange County for requests such as “How to Remove Road Tar From Car Paint Safely.” Review the Exterior Detailing page for the closest service match, browse the Orange County service area, or use the online booking form to choose a vehicle and see currently configured options. The submitted request is reviewed before the appointment is confirmed.

    Frequently asked questions

    Does clay remove road tar?

    Clay may remove some remaining contamination, but it is abrasive contact and is not the first choice for thick tar. For remove tar from car paint, use that answer as a starting point and verify the actual vehicle, material, and approved service scope.

    Will tar remover strip wax?

    Some removers can weaken protection. Assume the treated area may need fresh protection unless the product states otherwise. For remove tar from car paint, use that answer as a starting point and verify the actual vehicle, material, and approved service scope.

    Can I use the same towel on the rest of the car?

    No. Isolate tar towels, inspect them, and keep contaminated fibers away from cleaner panels. For remove tar from car paint, use that answer as a starting point and verify the actual vehicle, material, and approved service scope.

    What if tar is on matte paint?

    Do not polish or use gloss-changing products. Follow the matte-finish maker's instructions and seek specialist help. For remove tar from car paint, use that answer as a starting point and verify the actual vehicle, material, and approved service scope.

    Suggested reading

    These related MDC guides explain decisions adjacent to remove tar from car paint and use the same inspect-first approach:

    Sources and care directions

    Sources for this remove tar from car paint guide were reviewed September 12, 2026. External material is provided for context; product labels, current manufacturer instructions, and the manual for the exact vehicle control the work.

    Request exterior care before scattered tar spots turn into a rushed, abrasive cleanup.

    For remove tar from car paint, tell us the vehicle, condition, service location, and result you want. We will review the request, confirm the scope and agreed final price, and send appointment updates as the job moves forward.
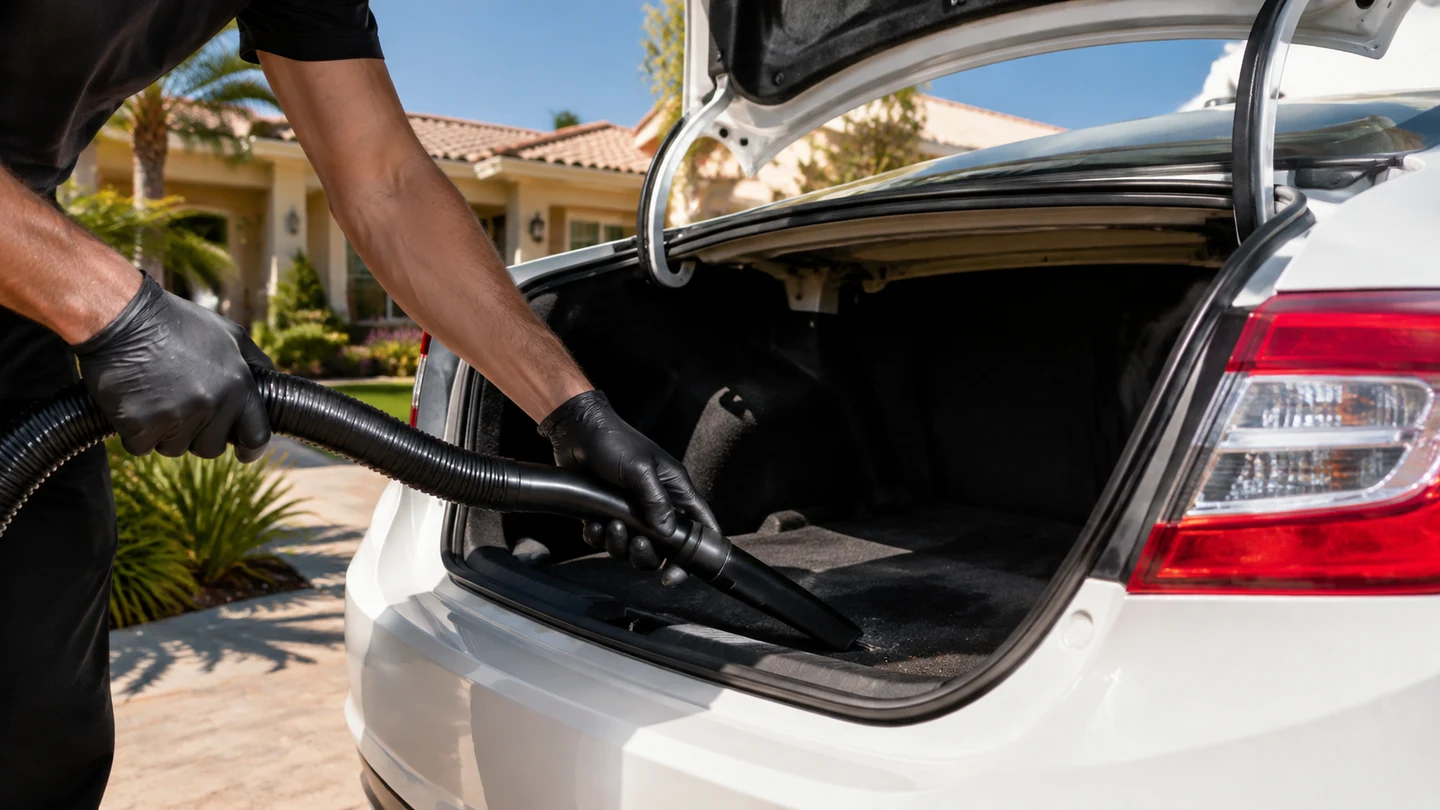
  • How to Remove Baked-On Tree Sap Without Damaging Car Paint

    How to Remove Baked-On Tree Sap Without Damaging Car Paint

    Menu

    PAINT & WHEEL CARE

    How to Remove Baked-On Tree Sap Without Damaging Car Paint

    How to remove baked on tree sap from car. Learn the process, timing, local conditions, common mistakes, and when professional help makes sense in this.

    Serving every city and neighborhood in Orange County, California.

    Mobile detailing service in Orange County for how to remove baked on tree sap from car

    By Blog Writer · approximately 14 minute read · Updated September 2026 · Topic: how to remove baked on tree sap from car

    Quick answer: how to remove baked on tree sap from car

    Start on a cool, clean surface with a product specifically labeled safe for the vehicle finish. Soften the deposit, allow the directed dwell time, lift with clean microfiber, and repeat gently instead of scraping or jumping straight to abrasion.

    Paint care should move from the least aggressive suitable method to stronger correction only after inspection. A hidden-area test and a cool, clean surface reduce avoidable surprises. For how to remove baked on tree sap from car, the purpose of this guide is to help you ask better questions, choose a suitable scope, and know what to inspect before accepting the result. It cannot replace the care instructions for your exact vehicle, finish, upholstery, accessory, or cleaning product.

    When people search for how to remove baked on tree sap from car, they often want a single number or shortcut. The responsible answer is a repeatable process: identify the surface and condition, control the work area, use compatible tools and chemistry, remove residue, allow required drying or curing, and inspect again. That process protects the vehicle and gives the customer a clearer handoff.

    What changes the right answer

    The following variables determine whether common how to remove baked on tree sap from car advice is appropriate. Review them together for “How to Remove Baked-On Tree Sap Without Damaging Car Paint”; one factor can change the method even when the rest of the vehicle looks ordinary.

    Fresh sticky sap versus hardened resin

    Fresh sticky sap versus hardened resin. Treat this as a decision point, not a box to check. Record what you observe, compare it with the vehicle or product instructions, and choose the least aggressive suitable response. That discipline keeps how to remove baked on tree sap from car guidance tied to the actual vehicle instead of a generic promise. Paint care should move from the least aggressive suitable method to stronger correction only after inspection. A hidden-area test and a cool, clean surface reduce avoidable surprises.

    Paint, PPF, wrap, or matte finish

    Paint, PPF, wrap, or matte finish. Look at this factor before tools or chemicals touch the surface. It changes the labor, the safe method, and the result that can reasonably be approved. If the condition is uncertain, pause for a concealed-area test or a professional inspection rather than increasing force.

    Surface temperature

    Surface temperature. This detail is easy to overlook, yet it often explains why two similar-looking vehicles need different plans. Confirm it in useful light, keep notes or photos when appropriate, and make the customer or technician aware of any limitation before the work proceeds.

    Product compatibility

    Product compatibility. The practical test is whether the chosen method removes the unwanted material without changing the surface underneath. Work in a small controlled area, inspect the towel or tool, and stop when the finish reacts differently than expected.

    Deposit thickness and edges

    Deposit thickness and edges. Build enough time for this into the appointment. Rushing tends to move contamination, leave residue, or skip drying and inspection. A clear sequence makes the result easier to verify at customer handoff and easier to maintain afterward.

    Staining or etching after removal

    Staining or etching after removal. Consider both the visible surface and what sits below or behind it. Moisture, foam, seams, coatings, electronics, and prior repairs may not be obvious. Material identification is part of good how to remove baked on tree sap from car work, not an optional extra.

    Decision factors for how to remove baked on tree sap from car
    Use condition and material—not guesswork—to choose the scope.

    A practical step-by-step plan

    This sequence keeps how to remove baked on tree sap from car work observable and reversible for as long as possible. Product labels and the vehicle owner’s manual take priority whenever they set a narrower limit.

    Step 1: Wash loose dirt around the spot

    Wash loose dirt around the spot. This detail is easy to overlook, yet it often explains why two similar-looking vehicles need different plans. Confirm it in useful light, keep notes or photos when appropriate, and make the customer or technician aware of any limitation before the work proceeds.

    Step 2: Move the vehicle into shade

    Move the vehicle into shade. The practical test is whether the chosen method removes the unwanted material without changing the surface underneath. Work in a small controlled area, inspect the towel or tool, and stop when the finish reacts differently than expected.

    Step 3: Test the remover in a hidden area

    Test the remover in a hidden area. Build enough time for this into the appointment. Rushing tends to move contamination, leave residue, or skip drying and inspection. A clear sequence makes the result easier to verify at customer handoff and easier to maintain afterward.

    Step 4: Soften rather than scrape

    Soften rather than scrape. Consider both the visible surface and what sits below or behind it. Moisture, foam, seams, coatings, electronics, and prior repairs may not be obvious. Material identification is part of good how to remove baked on tree sap from car work, not an optional extra.

    Step 5: Blot and lift with clean microfiber

    Blot and lift with clean microfiber. Use the same standard on every section: inspect, test, perform the minimum effective action, remove residue, then evaluate again. That makes the process repeatable without pretending every panel, seat, lens, or vehicle is identical.

    Step 6: Wash away product residue

    Wash away product residue. Treat this as a decision point, not a box to check. Record what you observe, compare it with the vehicle or product instructions, and choose the least aggressive suitable response. That discipline keeps how to remove baked on tree sap from car guidance tied to the actual vehicle instead of a generic promise.

    Step 7: Inspect and protect the finish

    Inspect and protect the finish. Look at this factor before tools or chemicals touch the surface. It changes the labor, the safe method, and the result that can reasonably be approved. If the condition is uncertain, pause for a concealed-area test or a professional inspection rather than increasing force.

    Step-by-step process for how to remove baked on tree sap from car
    A controlled sequence makes the final inspection more meaningful.

    Timing, cost, and realistic expectations

    Time and price for how to remove baked on tree sap from car follow scope. A lightly affected, accessible area may need a short maintenance step; an older vehicle with embedded soil, prior product residue, multiple materials, or damage needs more inspection and labor. A quote should state the selected service, vehicle class, add-ons, and agreed final amount. Duration is useful for planning the detailer’s work and the customer’s handoff, but it should not be used to rush a careful process.

    Some how to remove baked on tree sap from car results can be judged immediately, such as loose debris removal or a clean exterior panel. Upholstery, carpet, coatings, and odor work may need drying or cure time before the final condition is clear. Permanent dye change, coating failure, cracks, corrosion, burned paint, worn fabric, and contamination deep inside foam are not the same as removable soil. A reputable service distinguishes improvement from repair and does not guarantee an outcome before inspection.

    For “How to Remove Baked-On Tree Sap Without Damaging Car Paint,” ask what is included, what is excluded, how a condition-based add-on is approved, and what happens if the technician finds damage or a material that cannot be treated safely. MDC’s booking form displays the configured service prices and selectable extras. Operations confirms the appointment and final scope so the customer and detailer share the same record.

    Orange County conditions to consider

    Warm Orange County sun can bake sap onto horizontal panels quickly. Tree-lined parking in neighborhoods and office lots makes early spot removal far safer than waiting for the next full wash.

    Mobile how to remove baked on tree sap from car work also depends on the service location. The vehicle needs a safe, lawful, accessible area with permission from the property owner or manager when required. Water, power, shade, traffic, gates, parking rules, and runoff control may affect whether the planned process can be completed there. A good booking request describes those conditions instead of leaving the technician to discover them at arrival.

    Weather can change during a “How to Remove Baked-On Tree Sap Without Damaging Car Paint” appointment. Hot panels shorten product dwell time, wind moves dust across clean surfaces, coastal humidity slows fabric drying, and unexpected rain can make exterior work unsuitable. Rescheduling or adjusting a scope protects the result; it is not a reason to skip preparation, documentation, or customer approval.

    Common mistakes to avoid

    Most avoidable damage comes from excessive force, incompatible chemistry, cross-contaminated tools, uncontrolled moisture, or a rushed handoff. Watch for these specific errors when planning how to remove baked on tree sap from car.

    Using a razor blade

    Using a razor blade. Build enough time for this into the appointment. Rushing tends to move contamination, leave residue, or skip drying and inspection. A clear sequence makes the result easier to verify at customer handoff and easier to maintain afterward.

    Rubbing dry sap across dusty paint

    Rubbing dry sap across dusty paint. Consider both the visible surface and what sits below or behind it. Moisture, foam, seams, coatings, electronics, and prior repairs may not be obvious. Material identification is part of good how to remove baked on tree sap from car work, not an optional extra.

    Flooding trim with solvent

    Flooding trim with solvent. Use the same standard on every section: inspect, test, perform the minimum effective action, remove residue, then evaluate again. That makes the process repeatable without pretending every panel, seat, lens, or vehicle is identical.

    Working on a hot panel

    Working on a hot panel. Treat this as a decision point, not a box to check. Record what you observe, compare it with the vehicle or product instructions, and choose the least aggressive suitable response. That discipline keeps how to remove baked on tree sap from car guidance tied to the actual vehicle instead of a generic promise.

    Assuming the remaining shadow is still sap

    Assuming the remaining shadow is still sap. Look at this factor before tools or chemicals touch the surface. It changes the labor, the safe method, and the result that can reasonably be approved. If the condition is uncertain, pause for a concealed-area test or a professional inspection rather than increasing force.

    When professional help makes sense

    Professional help with how to remove baked on tree sap from car is useful when the vehicle has several materials, limited access, embedded contamination, uncertain prior repairs, or a result that needs documented inspection. A technician can also identify when the condition belongs with a body shop, upholstery repairer, glass specialist, electrician, mold remediator, hazardous-spill service, or another qualified trade. Saying that a surface should not be treated is sometimes the safest professional conclusion.

    MDC offers mobile service throughout Orange County for requests such as “How to Remove Baked-On Tree Sap Without Damaging Car Paint.” Review the Exterior Detailing page for the closest service match, browse the Orange County service area, or use the online booking form to choose a vehicle and see currently configured options. The submitted request is reviewed before the appointment is confirmed.

    Frequently asked questions

    Will warm water remove sap?

    It may help soften some fresh deposits, but hardened resin often needs a finish-safe labeled remover and patient repeat treatment. For how to remove baked on tree sap from car, use that answer as a starting point and verify the actual vehicle, material, and approved service scope.

    Can rubbing alcohol damage paint?

    Concentration, dwell, finish type, and prior repair matter. Follow vehicle and product guidance and test first. For how to remove baked on tree sap from car, use that answer as a starting point and verify the actual vehicle, material, and approved service scope.

    What if the spot remains after sap is gone?

    The residue may have stained or etched the finish. Stop adding force and have the area assessed. For how to remove baked on tree sap from car, use that answer as a starting point and verify the actual vehicle, material, and approved service scope.

    Can sap damage PPF?

    Film has its own chemical limits. Follow the film maker's care instructions or ask the installer before using a remover. For how to remove baked on tree sap from car, use that answer as a starting point and verify the actual vehicle, material, and approved service scope.

    Suggested reading

    These related MDC guides explain decisions adjacent to how to remove baked on tree sap from car and use the same inspect-first approach:

    Sources and care directions

    Sources for this how to remove baked on tree sap from car guide were reviewed September 12, 2026. External material is provided for context; product labels, current manufacturer instructions, and the manual for the exact vehicle control the work.

    Add an exterior-detail request and describe the sap location so MDC can inspect it before selecting a removal method.

    For how to remove baked on tree sap from car, tell us the vehicle, condition, service location, and result you want. We will review the request, confirm the scope and agreed final price, and send appointment updates as the job moves forward.